
Click the Categorization tab to create the categorization rules that analyze each event encountered by RightITnow ECM. The RightITnow ECM installation process deploys the rsylog, snmp, and default categorization rules. RightITnow ECM deploys SolarWinds categorization rules upon deployment of a SolarWinds connector, and VMware rules upon deployment of a VMware server.
There are three possible outcomes after an event is analyzed against the categorization rules:
Alert creation: If an event triggers a categorization rule that has not already created an alert for a similarly matching event, then the Categorization service creates an alert for that event.
De-duplication: If an event triggers a categorization rule that has already created an alert for a similarly matching event, then the Categorization service adds the event to the count of alerts of similarly matched events. This means that in the Alerts table, you do not see a new alert for every event of a kind, rather, you see one alert with a frequency count:
Unmatched Event: If an event does not trigger an existing rule, the Categorization service triggers a default rule that creates a basic generic alert for the event.
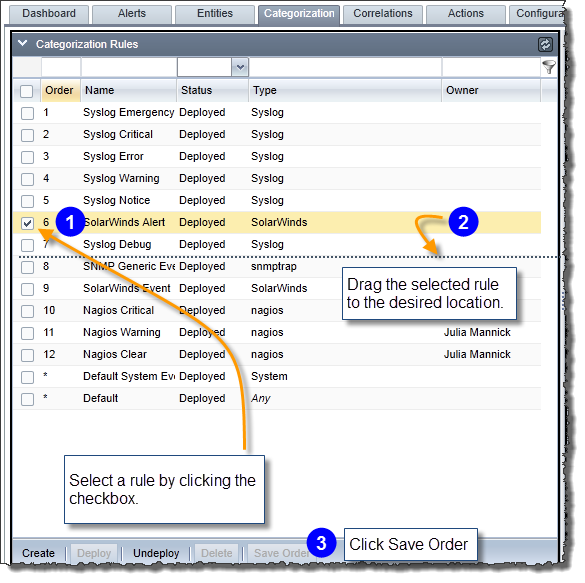
RightITnow ECM evaluates each event against the categorization rules and triggers the first rule that is true for an event. At that time, no other rules are applied to the event. RightITnow ECM evaluates the rules in the order shown in the Categorization Rules pane on the left. You can change the order of rules so that RightITnow ECM evaluates them in the order of your choosing. It can be helpful to order rules from specific to general. For example, you may have seven rules. The first six rules check for a known unique value for an entity per rule, and the last catch-all rule checks for any value for the entity, including those not covered by the first six rules. Using this hierarchy, you can handle alerts with much greater specificity than if you had reversed the hierarchy and run the catch-all rule first and the specific rules later.
To change the order of Categorization rules:
Using the graphical rule builder in the RuleBuilder pane on the right, you name and describe the rule, assign an owner, assign connectors, define conditions, construct de-duplication criteria, and set the corresponding alerts' fields.
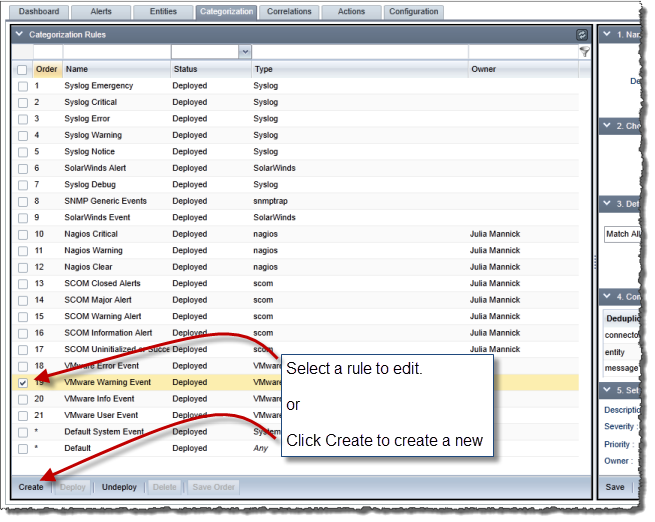
To build categorization rules:
Select a rule to edit or click Create to create a new rule, as shown below:
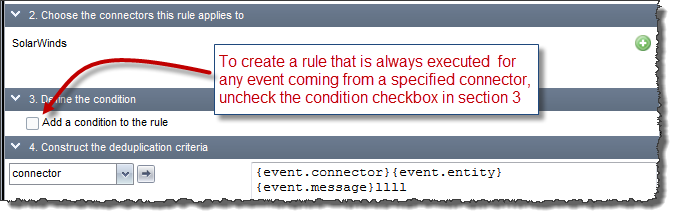
Use the graphical rule builder in the RuleBuilder pane on the right to configure the rule, as shown below:
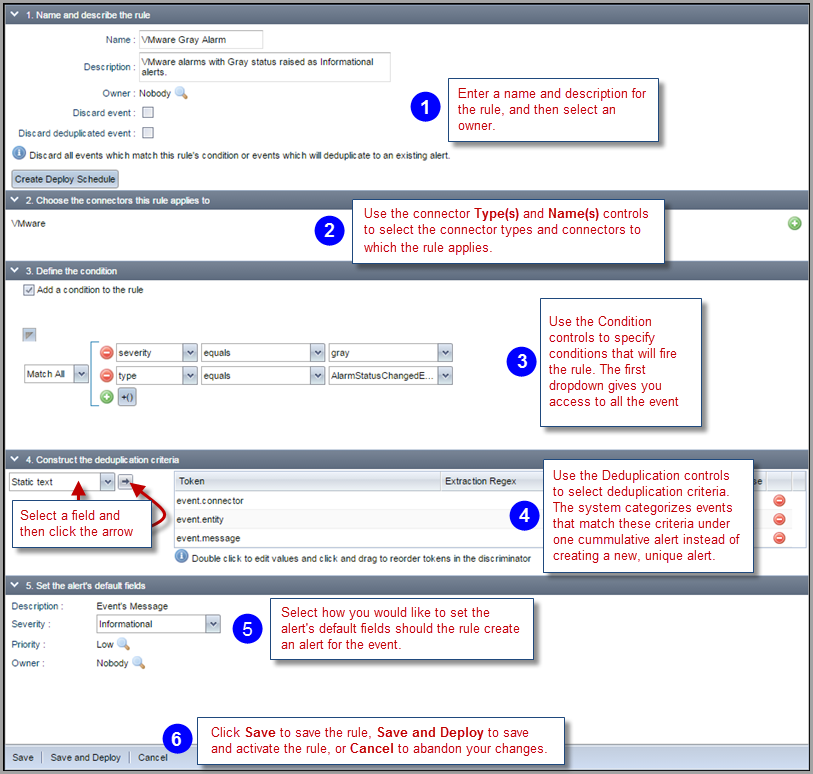
See Building Conditions Using Wildcards to learn how to use wildcards in step 4 in the screenshot above, and see Constructing Deduplication Criteria below for details about constructing deduplication criteria.
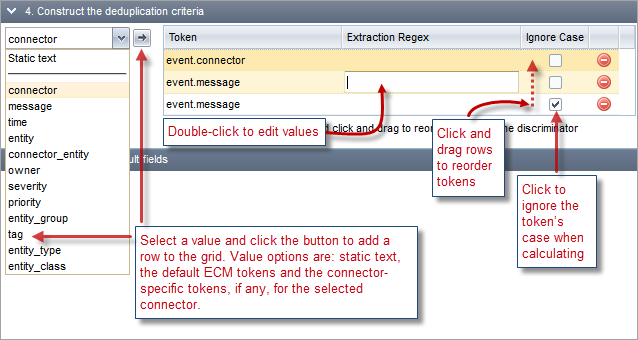
The following illustration describes how to use the Deduplication Criteria Builder:
Example:
Given deduplication criteria composed as follows:
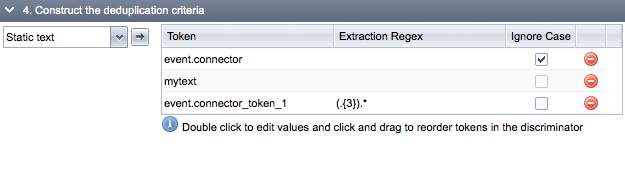
And an event as follows:
{connector=MyConnector, entity=ent1.uk.domain.com, …, connector_token_1=TEST1, connector_token_2=QWERTY}
And a rule that applies the given criteria to the event, then the event's discriminator would be:
myconnectormytextTES
To discard an event after deduplication:
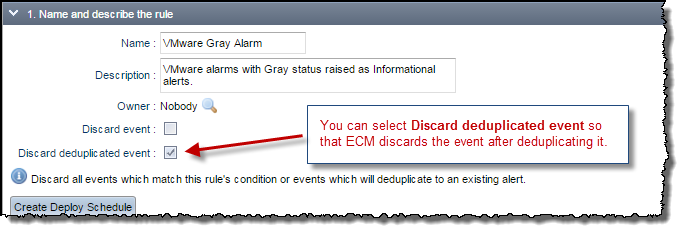
This setting discards all events which match this rule's condition or events which will deduplicate to an existing alert.
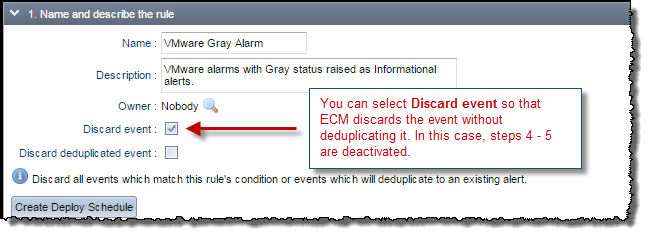
To discard an event without deduplication:
The ability to deploy and undeploy rules allows you to create libraries of rules and deploy them at will. To deploy or undeploy a rule, click the checkmark adjacent to the rule you wish to deploy or undeploy, and then click the Deploy or Undeploy button at the bottom of the Categorization Rules pane.
You can schedule the deployment and un-deployment of Categorization rules. This allows you to take rules online and offline very conveniently.
To configure the deployment schedule:

The Scheduling window appears.
Use the Scheduling window to configure the schedule:
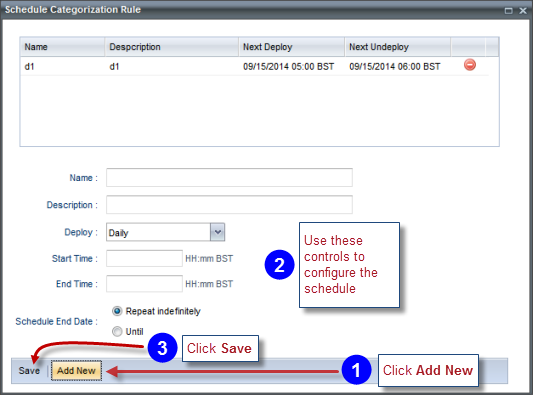
The Start Time is when the rule will be deployed, and the End Time when it will be undeployed.