Click the Configuration tab to configure SLA and audit settings, as shown below:
Use the Manage Audit tab to finely control what you audit.
To manage the audit log settings:
The Manage Audit tab appears.

Now you can view the selected entries in the audit log as described in Viewing the RightITnow ECM Audit Log.
The audit log displays all the activities occurring in the system, such as change of owner or severity of events.
The following illustration describes the available audit log settings and you can control which entries RightITnow ECM creates as described in Managing the RightITnow ECM Audi Log:

To view the audit log:
The audit log appears.
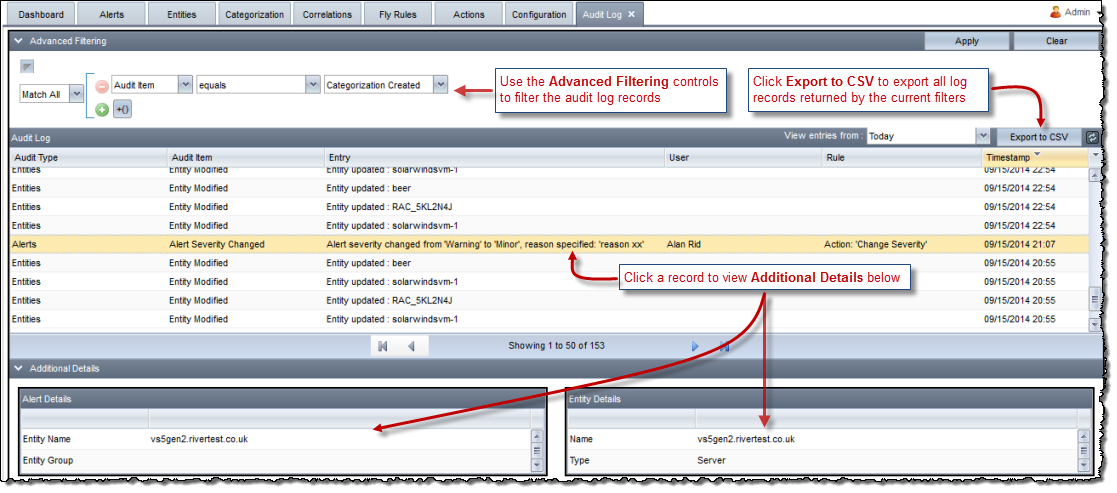
You can view the audit records for an individual alert by clicking the
![]() at the extreme right of the Alert's row on the Alerts Console, which invokes an
Alert log window. At this point, you can enter your own comment for the
alert by clicking the
at the extreme right of the Alert's row on the Alerts Console, which invokes an
Alert log window. At this point, you can enter your own comment for the
alert by clicking the ![]() .
.
RightITnow ECM offers Service Level Agreement (SLA) functionality. See the top level topic, Managing Service Level Agreements for an overview. This section describes how to configure SLA rules.
To configure SLA rules:
Access the Manage SLA settings by clicking the Configuration tab and then selecting Manage SLA from the SLA and Audit area, as shown above.
The Manage SLA tab appears.
Define the frequency at which to run the rules as described below:

Use the Manage SLA tab to configure SLA rules as described below:
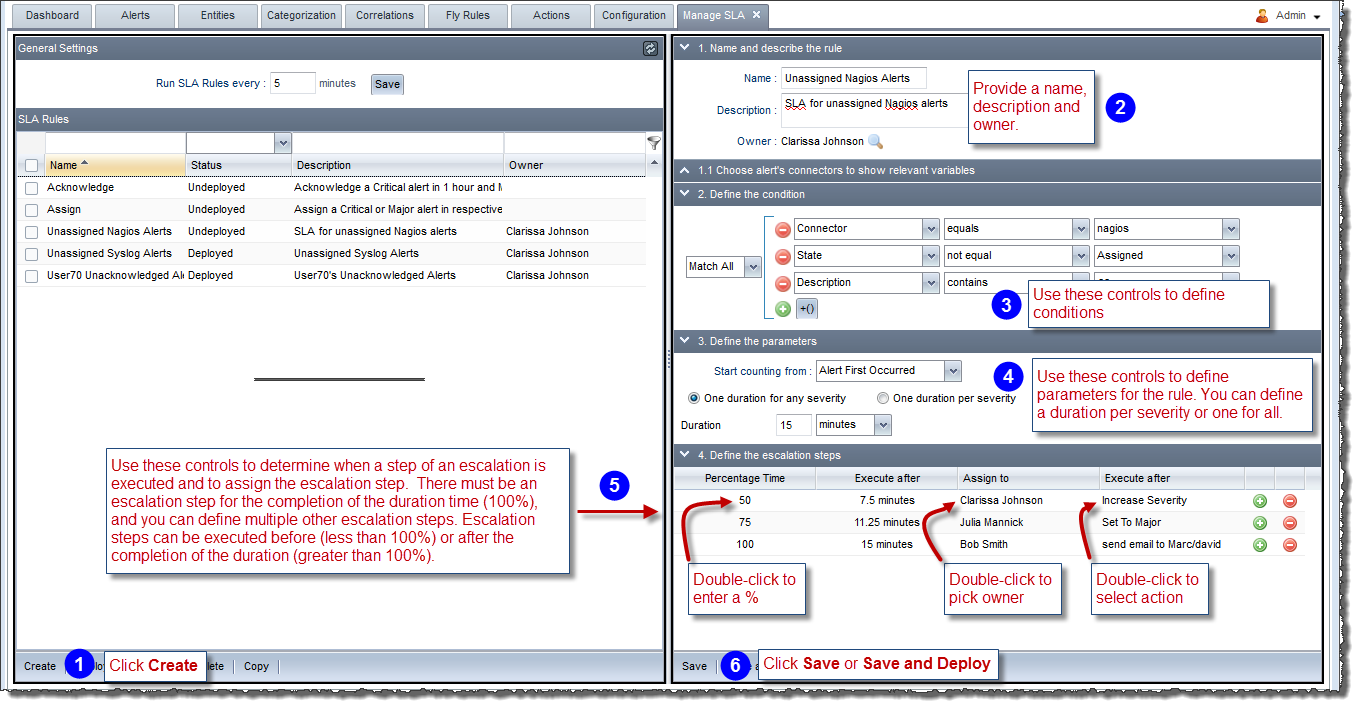
In addition to default fields, you can select a custom date field from the Start counting from: menu, shown in area 4 of the figure above.
Note: Both the owner in the Assign to column and the Action are optional. Therefore, you can have an escalation step that only assigns or one that only executes an action.
You can schedule the deployment and un-deployment of SLA rules. This allows you to take rules online and offline very conveniently.
To configure the deployment schedule:
The Manage SLA tab appears.

The Scheduling window appears.
Use the Scheduling window to configure the schedule:
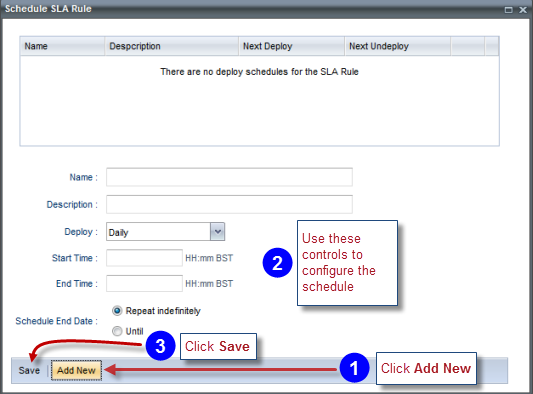
The Start Time is when the rule will be deployed, and the End Time when it will be undeployed.
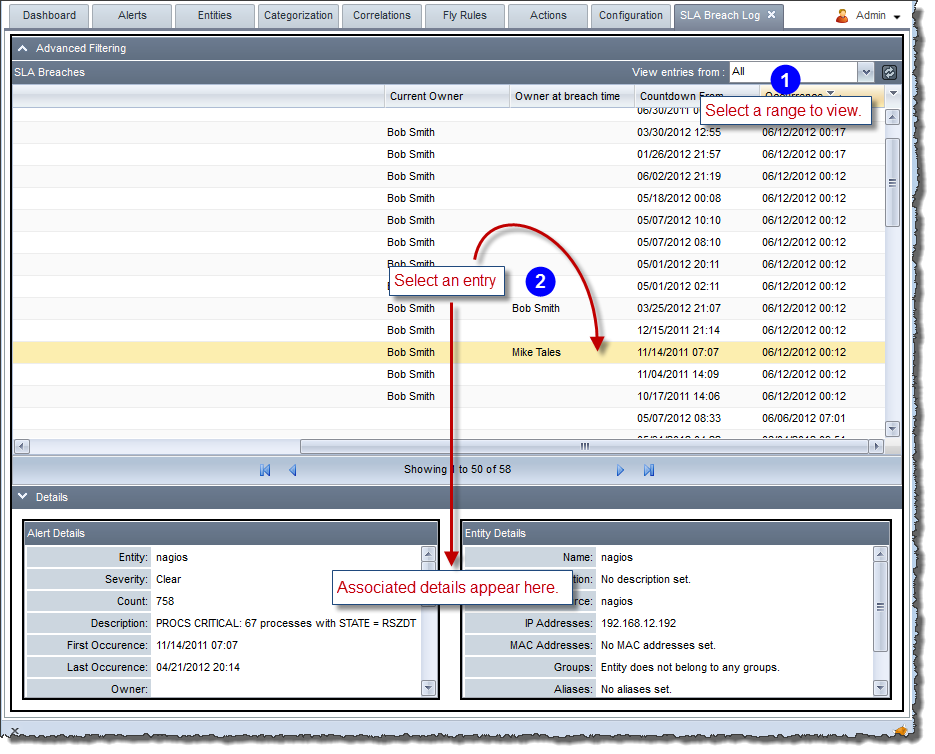
RightITnow ECM offers SLA tracking functionality. See Managing Service Level Agreements for an overview. The SLA breach log displays list of SLA breaches that have occurred in the installation's lifetime, or selected subset of history, ordered by last time a breach has occurred.
Note: To purge the SLA Breach Log, see Using the_Purge Utility.
To view the SLA Breach Log:
Access the SLA Breach Log settings by clicking the Configuration tab and then selecting SLA Breach Log from the SLA and Audit area, as shown above.
The SLA Breach Log tab appears.
View the SLA Breach Log as described below: