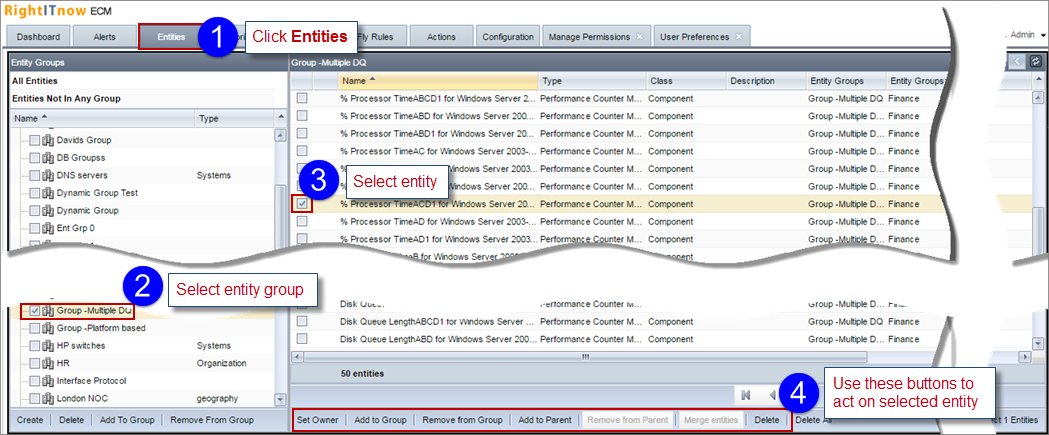
Click the Entities tab to view, edit, group and ungroup, assign ownership, setup maintenance schedules, and delete entities known to the system. RightITnow ECM populates the system with entities from an external CMDB using the connectors that you set up when you configured the system, or through passive discovery during the categorization process.
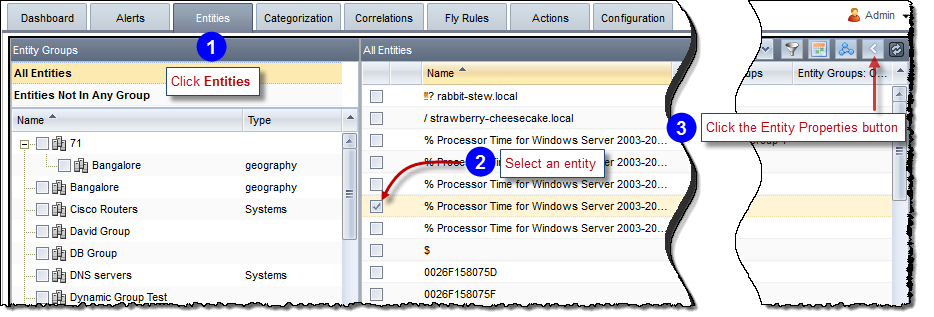
The Entities tab displays all the entities and entity groups in the system. You can select an individual entity and view and edit its properties.
To view an entity and edit its properties:
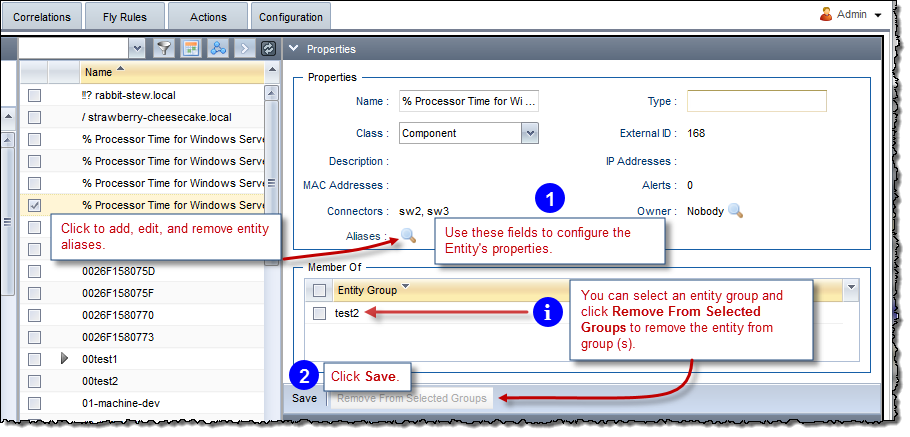
The Entity Properties pane appears.
Use the fields in the Entity Properties pane to configure the properties and then click Save:
| Field | Description |
| Name | This is the name of the entity as displayed in the Entity grid on the Entity tab. Click within the field and enter a new name for the entity. |
| Type | This is the type of the component, for example, you could enter Application WebLogic. |
| Class | This is thew class of the entity. use the drop-down menu to select one of the entity classes that your System Administrator setup using the Configuration tab. |
| Owner | This specifies the owner of the entity. Click the Search button
 to select an owner,
 |
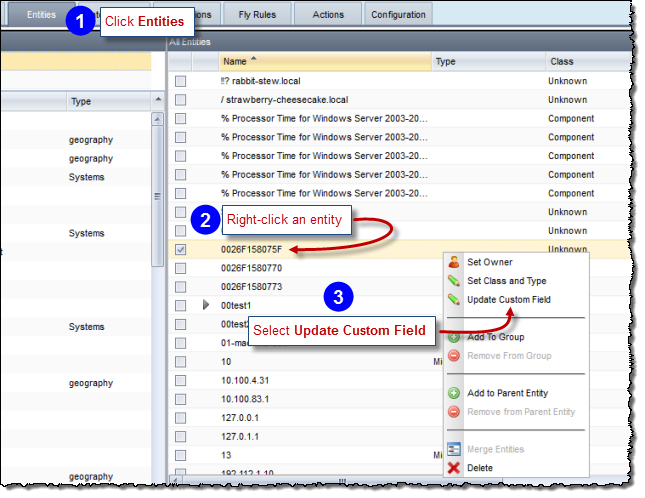
You can update an entity's custom field from the Entity Grid:
You can select entities in the entity grid and set them as the children of another entity.
To edit entity hierarchy:
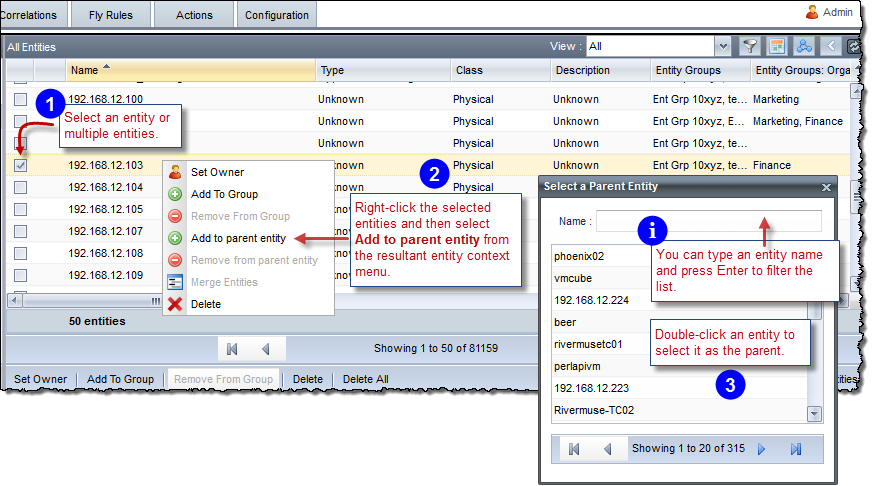
You must select non-polled entities to add to a parent entity, for example, entities not imported from Zenoss, SolarWinds, or VMware. You can also select several sibling child entities (non-polled) and remove them from their parent entity (undo the hierarchy) by choosing Remove from parent entity from the context menu.
RightITnow ECM allows you to logically organize entities into groups. Importantly, you can assign entities to multiple groups for multiple views into the system for powerful reporting capabilities on the Dashboard and for more flexibility on the Alerts Console. For example, you might want to group entities by geographical location, organizational structure, by customer, or by machine class, and these groups may or may not have common members.
Note: You use the Configuration tab to configure the types of entity groups available to the system. See Configuring Entity Group Types.
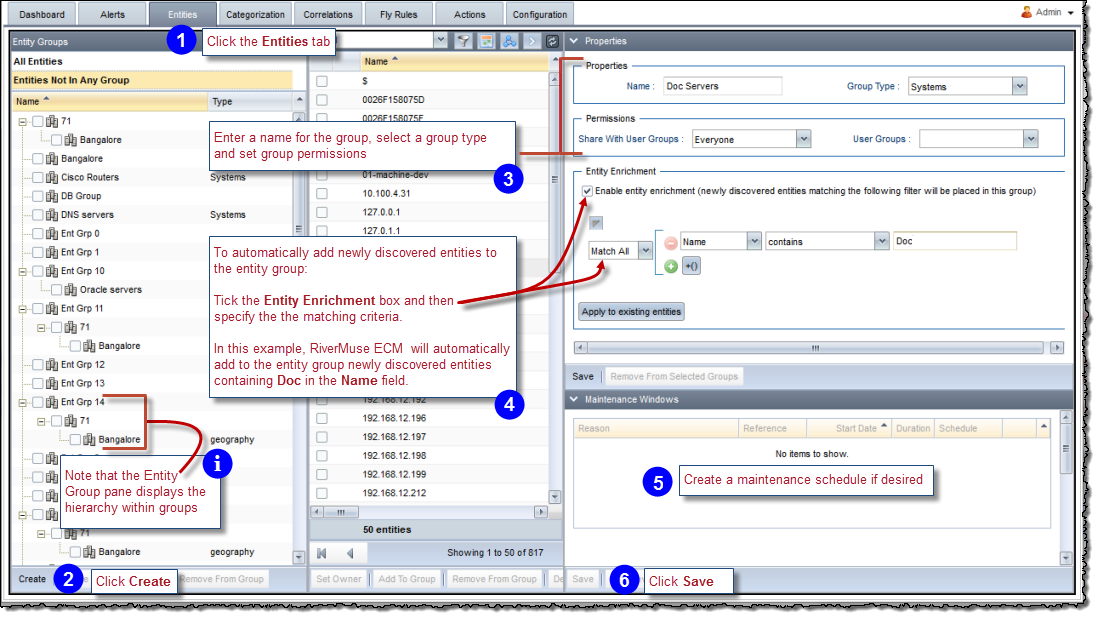
To group entities:
If you have not already done so, create the desired Entity Group by clicking Create in the Entity Group pane and then entering a name for the group:
Right-click an entity, select Move to Group, and then select a group, or select multiple entities and then click the Move To Group button at the bottom of the screen to move multiple entities at once.
Description |
See step 4 in the image above for instructions and an example: |
When creating an entity group, you can specify criteria that, if matched, automatically adds newly discovered entities to the entity group. This is a great way to manage entities in times of heightened onboarding of new entities. |
|
You can use the Entity toolstrip to manipulate entities. The toolstrip contains many of the commands available by right-clicking an entity.
To use the Entity toolstrip to manipulate entities:
The Add to Parent button invokes the Select a Parent Entity dialog box that lists entities and associated aliases for which you can choose a parent entity for the selected entity.
You can add entity groups to other entity groups and remove entity groups from groups as shown below:
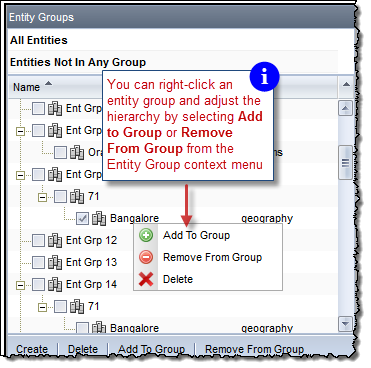
The entity group has an attribute called type. This attribute enables the user to filter and sort groups by their type in the Dashboard displets. For example if there were three groups called EMEA, APAC, and AMER and each group were assigned the type "geographic," the user could then report against those groups, filtering by the group type "geographic."
You assign types to groups upon creation as described in the screenshot above.
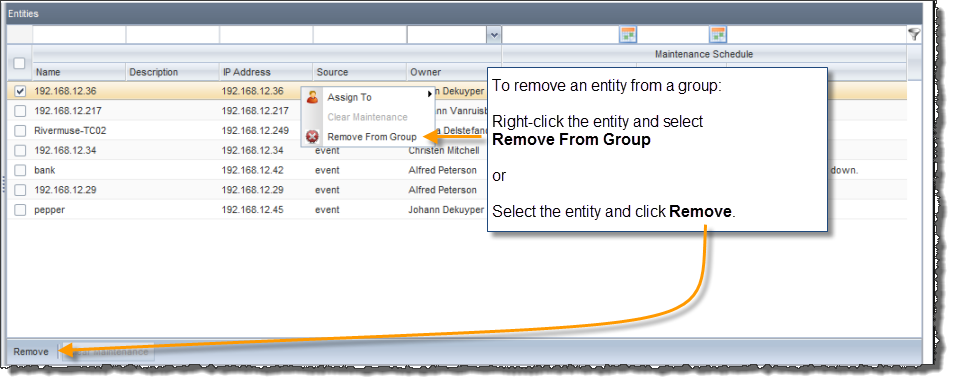
To remove an entity from a group:
You can merge multiple entities into one selected entity to reduce redundancy in your entity grid.
To merge entities:
The Merge Entities window appears:

ECM:
Note that it is not possible to merge entities which are polled by a connector (SolarWinds/VMWare/Zenoss). However, entities from one of these connectors can be the designate entity when merging.
You can assign or clear ownership to entities. RightITnow ECM will assign any new alerts originating from this entity to the entity owner.
To assign ownership to an entity:

Alternatively, you can select multiple entities and then click the Set Owner button at the bottom of the screen to assign multiple entities at once.
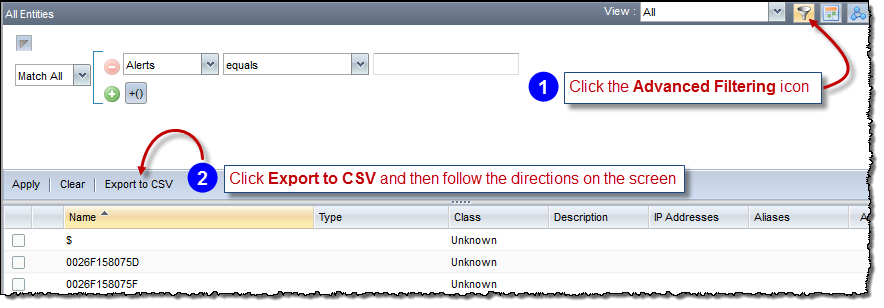
You can export the selected/filtered entities or all entities in the grid to a CSV file for manipulation and analysis in an external application.
To export entities data to a CSV file:
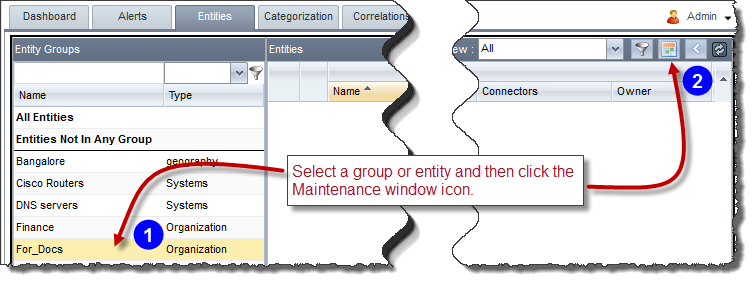
The Maintenance Windows pane displays all the entities in maintenance for the selected entity group or entity:
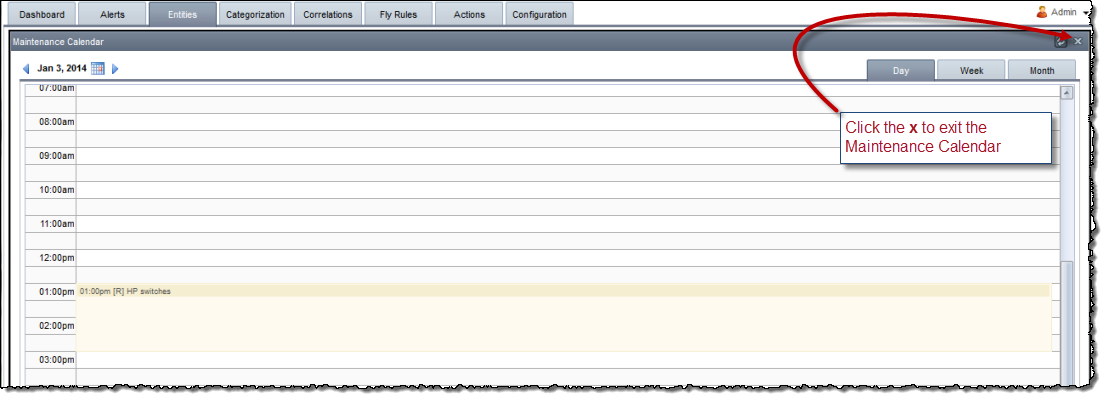
The Maintenance Calendar appears. Past maintenance periods are displayed with a strikeout.
RightITnow ECM affords a great degree of flexibility and functionality with the creation of maintenance windows, enabling you to:
When creating a new maintenance window on an entity/group keep in mind the following rules and options on maintenance inheritance:
To create a maintenance window:
Select the entity or entity group for which you want to create a maintenance window:
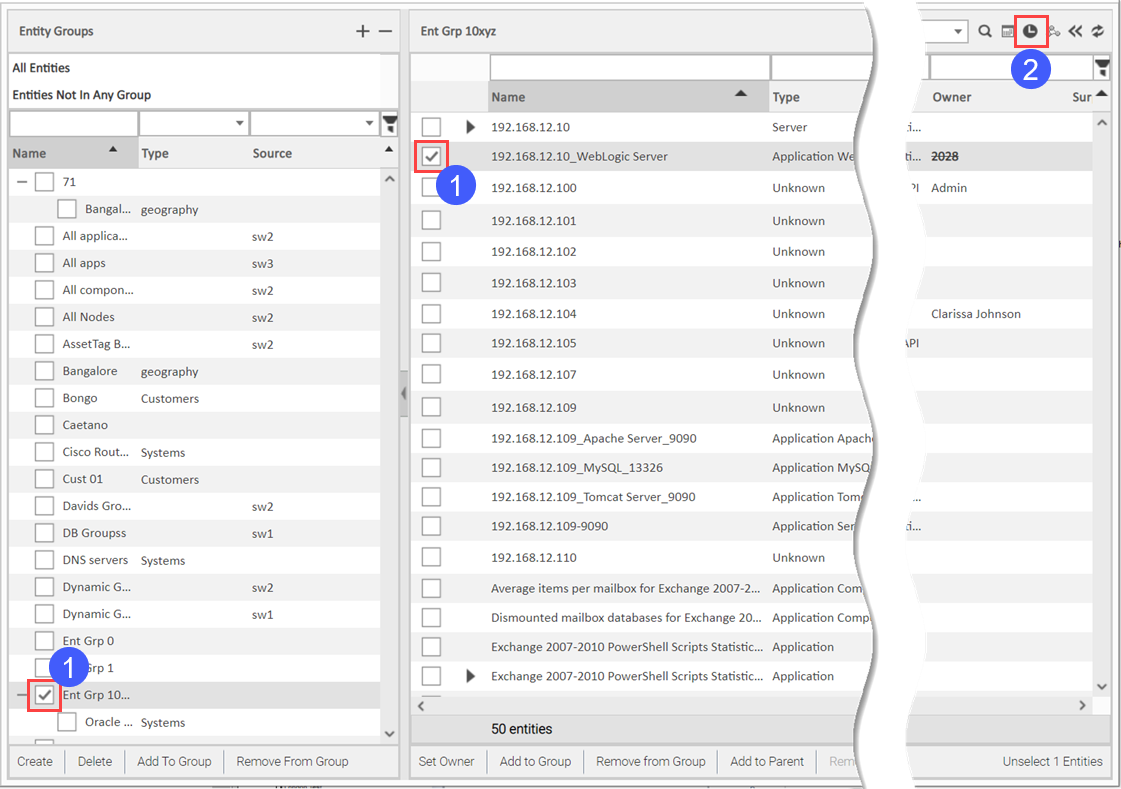
Click the Maintenance Manager
icon  .
.
Follow the instructions in Using the Maintenance Manager to finish creating the maintenance window.
When you create a maintenance window for an entity group imported from Zenoss, ECM also creates the maintenance window within Zenoss.
The following subsections describe how to delete entities.
To delete an individual entity:
Click the check box to the right of the entity to add a check mark in it, right-click the entity and then select Delete from the resultant menu. A dialog box appears:
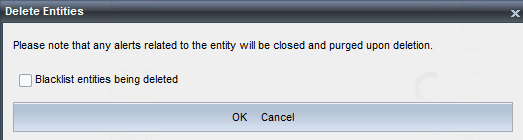
Check the Blacklist box if you would like to prevent the entity from being rediscovered by the system. Click OK to delete the entry.
Note: The system closes and purges any alerts associated with the entity upon deletion.
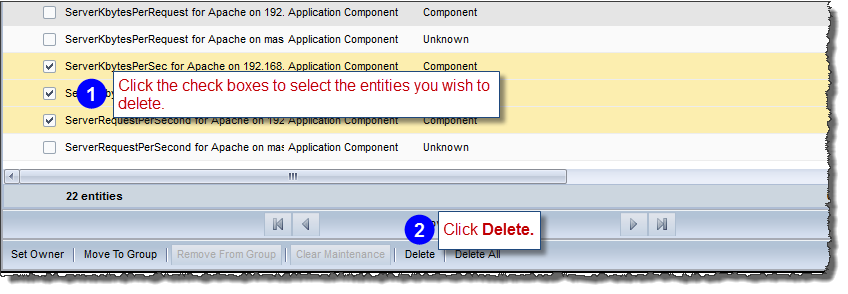
To delete many entities at once:
To delete ALL entities in the Entity Pane:
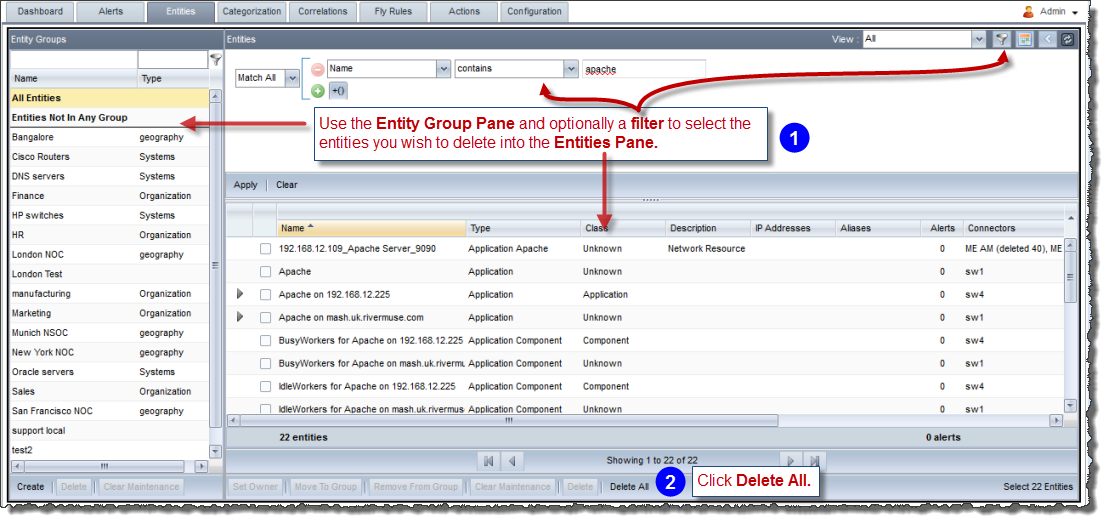
Note that you press Enter to apply the filter that you may create in step 1 in the image above.
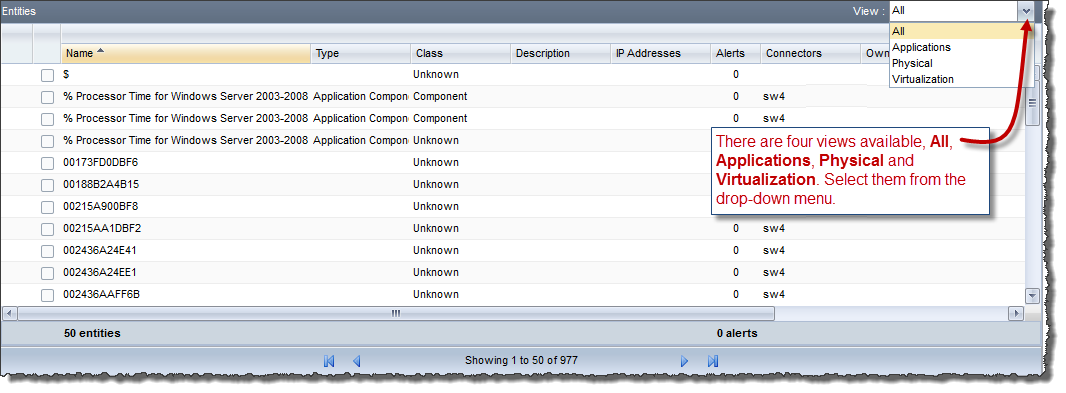
The Entity Console offers four views: All, Applications, Physical and Virtualization. Select them from the drop-down menu. Virtualization is useful for virtual environments to visualize which virtual nodes are children of which virtual servers, and for SolarWinds connectors to visualize which machines are connected to which switches and routers.
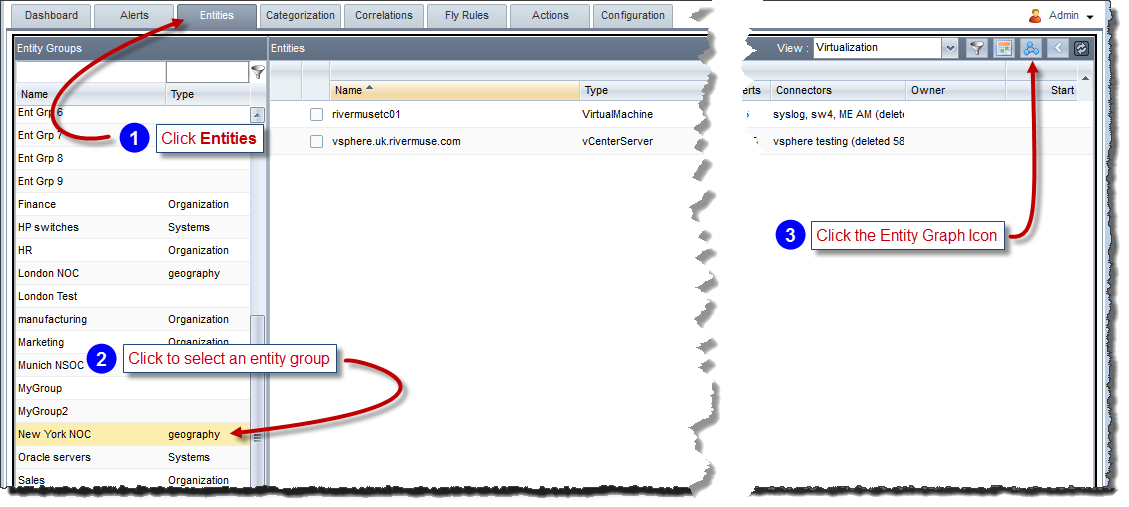
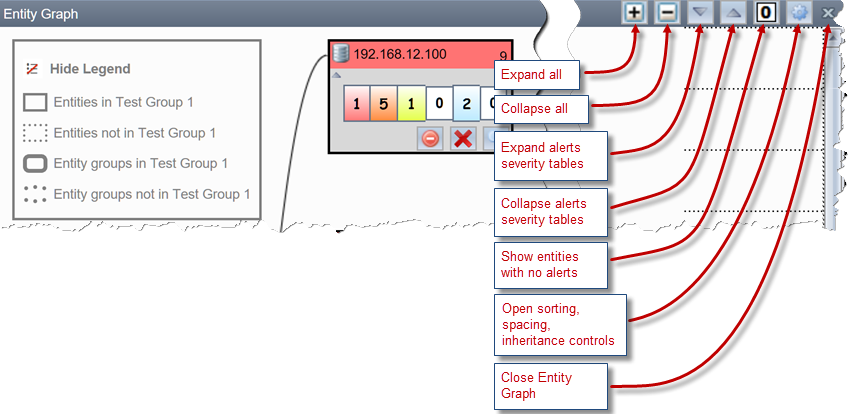
Entity Graph displays symbols representing entities and the entity relationships within an entity group. You can also perform operations on the entity symbols.
To use Entity Graph:
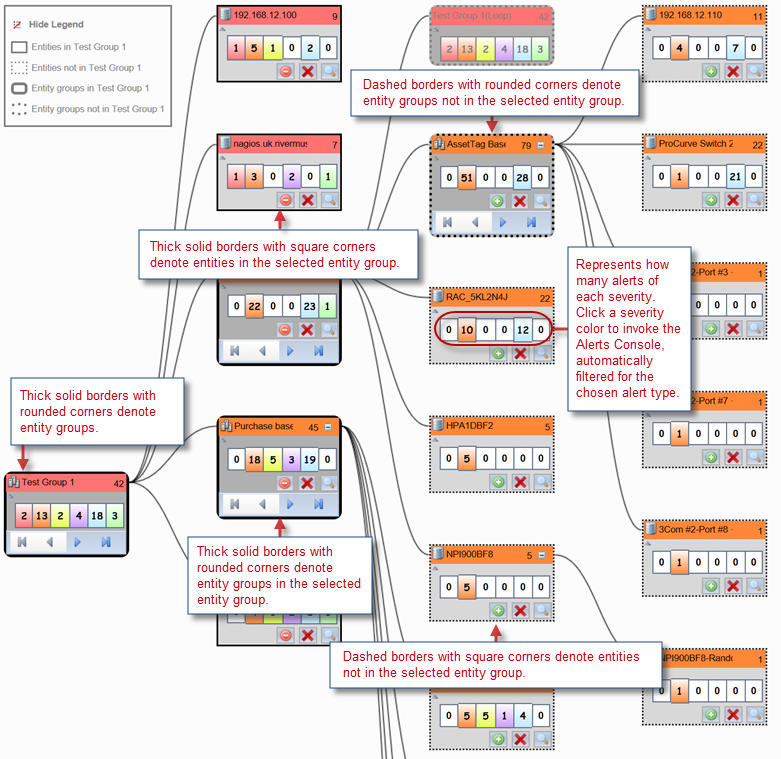
The Entity Graph pane appears.
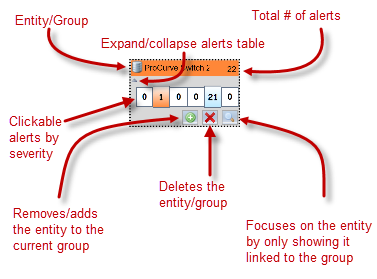
Explore the Entity Graph as illustrated below:
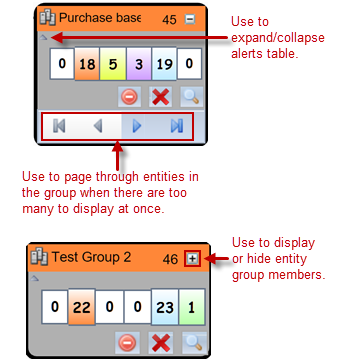
Use the Entity Graph controls to configure sorting, spacing, density, and inherited data.
To use the Entity Graph controls:
Select an entity group.
Click
the Entity Graph icon.
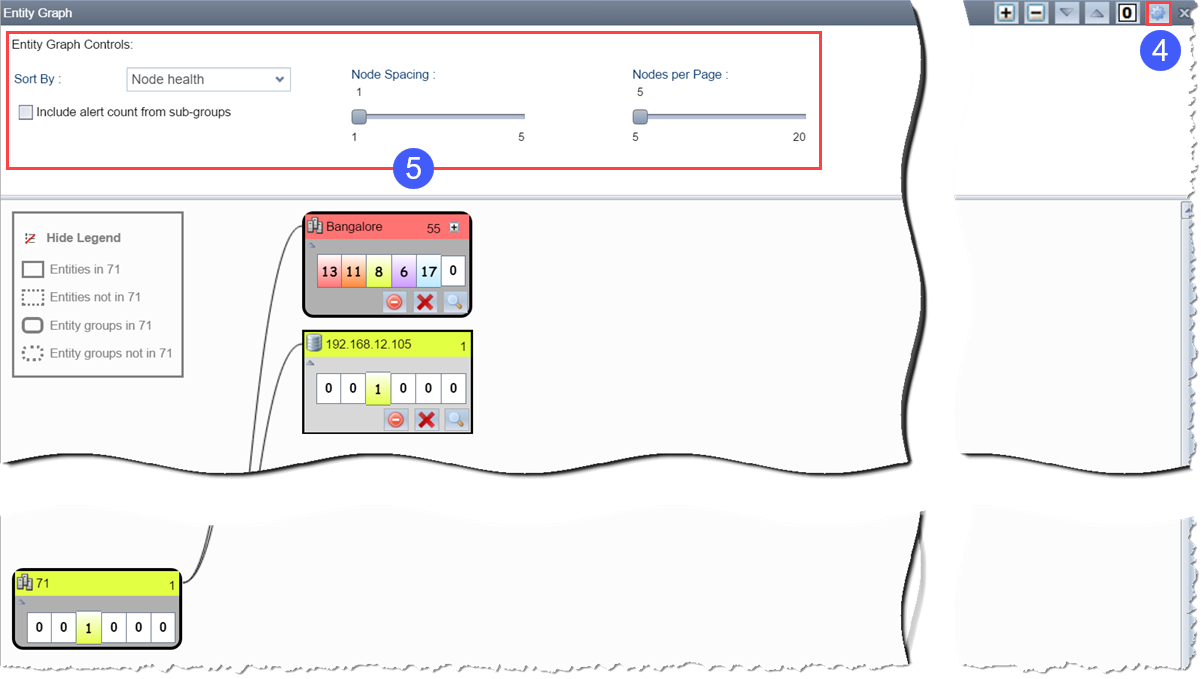
Click the Settings icon.
Use the Entity Graph controls to configure sorting, spacing, density, and inherited data.